AWS Authentication for Edge Applications using Strongbox Certificates
Edge applications often need to connect back to the cloud—commonly to send data or consume services. A critical part of this process is secure authentication with AWS. While tokens are frequently used, a stronger and more automated approach is to use short-lived client certificates.
In this guide, we’ll show how to use Strongbox on the Avassa platform to generate, distribute, and renew TLS certificates that enable AWS authentication through AWS Roles Anywhere. This eliminates manual certificate management and ensures that your edge workloads always have valid credentials when communicating with AWS.
Why use Strongbox with AWS Roles Anywhere?
Strongbox makes certificate management seamless by:
- Generating and rotating CAs automatically.
- Issuing short-lived certificates for applications.
- Distributing certificates securely to the right deployments at the edge.
- Automatically renewing certificates before expiration.
When combined with AWS Roles Anywhere, Strongbox certificates allow edge applications to assume IAM roles securely, without storing long-lived credentials.
Some names, e.g. s3-ca and s3-client-ca are overly verbosed named, this is to try to make it easier to follow the “link” between Strongbox and AWS.
Step 1: Generate a Certificate Authority (CA) in Strongbox
First, create a CA with a one-year TTL and configure automatic renewal.
supctl create strongbox tls ca <<EOF
name: s3-ca
ttl: 1y
cert-key-type: ecdsa
subject: s3-client-ca
auto-renew:
  renew-threshold: 30d
  activate-threshold: 7d
distribute:
  deployments:
    - s3-client
EOF
Export the CA certificate for AWS:
supctl --json show strongbox tls ca s3-ca | jq -r '."ca-cert"' > ca.pem
Step 2: Create a Vault and Client Certificate
Create a Strongbox vault to distribute certificates to edge sites running the s3-client deployment. Each client certificate has a TTL of 7 days and will be automatically renewed.
supctl create strongbox vaults <<EOF
name: s3-client
distribute:
  deployments:
    - s3-client
EOF

supctl create strongbox vaults s3-client secrets <<EOF
name: s3-client-cert
auto-cert:
  issuing-ca: s3-ca
  refresh-threshold: 2d
  ttl: 7d
  cert-type: client
  host: s3-client
allow-image-access: ["*"]
EOF
At this point, Strongbox ensures certificates are automatically rotated and available inside containers at the edge.
Step 3: Configure AWS Roles Anywhere
Now, configure AWS Roles Anywhere to trust Strongbox-issued certificates.
You need to create three AWS resources:
- Trust Anchor – links your Strongbox CA to AWS.
- IAM Role – defines what AWS resources the application can access.
- Profile – associates the IAM role with your trust anchor.
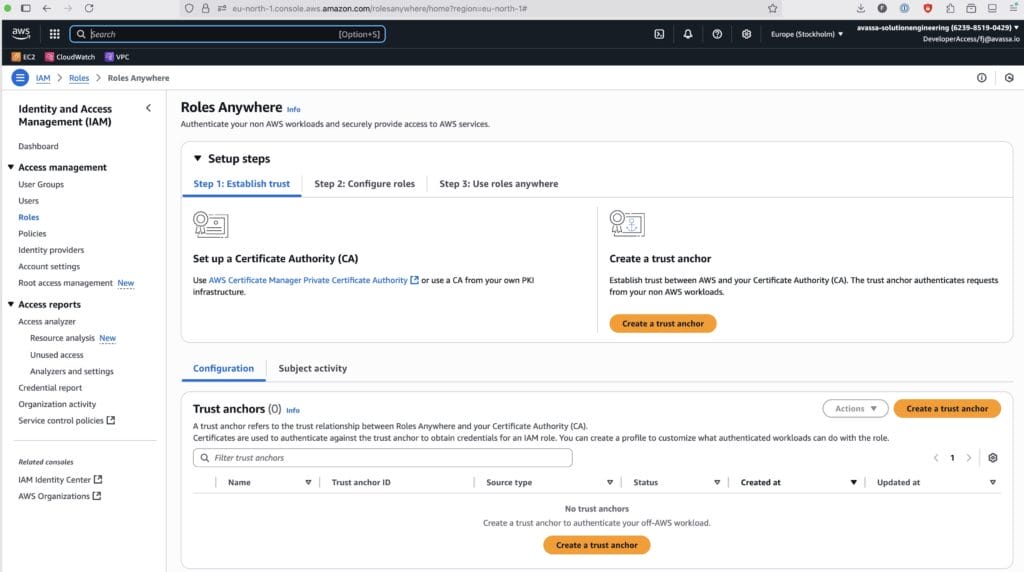
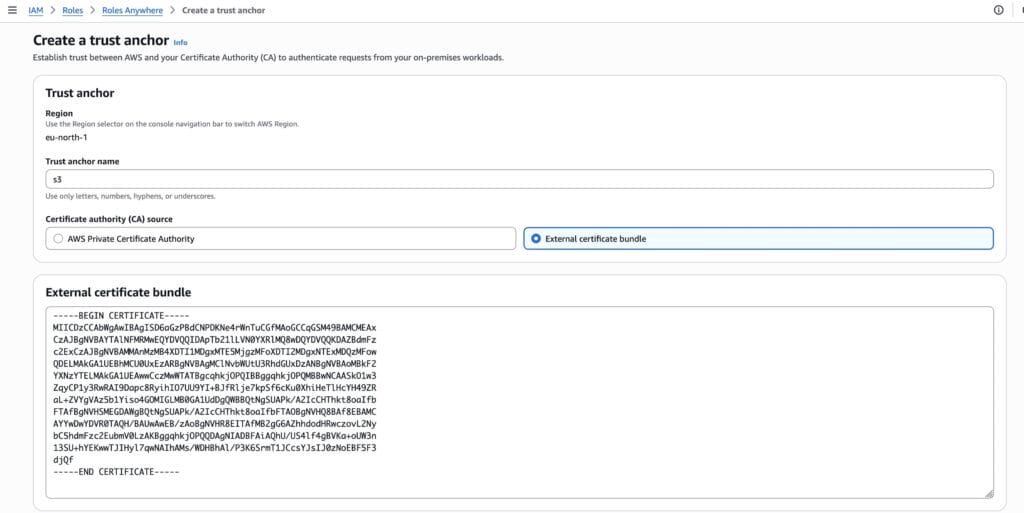
Create a Trust Anchor
In the AWS Console:
- Navigate to Roles Anywhere → Trust Anchors.
- Create a new trust anchor and paste in your exported ca.pem.
- Copy the Trust Anchor ARN.
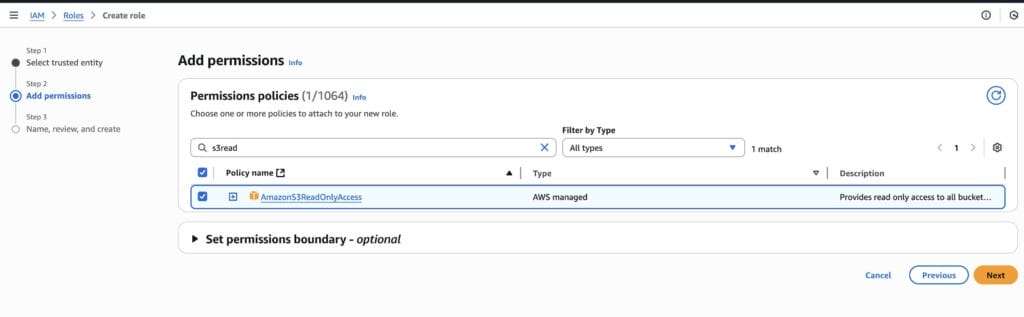
Create an IAM Role
Create a new role with a custom trust policy, referencing your Trust Anchor ARN. The mapping ties the certificate subject (CN) and issuer to your Strongbox settings.
Next we will configure AWS to accept the certificates and map them to a role.
{
    "Version": "2012-10-17",
    "Statement": [
        {
            "Effect": "Allow",
            "Principal": {
                "Service": "rolesanywhere.amazonaws.com"
            },
            "Action": [
                "sts:TagSession",
                "sts:SetSourceIdentity",
                "sts:AssumeRole"
            ],
            "Condition": {
                "ForAnyValue:StringEquals": {
                    "aws:PrincipalTag/x509Subject/CN": "s3-client",
                    "aws:PrincipalTag/x509Issuer/CN": "s3-client-ca"
                },
                "ArnEquals": {
                    "aws:SourceArn": "<Replace me with trust anchor ARN>"
                }
            }
        }
    ]
}
For this demo, attach read-only access to S3.
Note the Role ARN.
Create a Profile
Finally, create a profile in Roles Anywhere, attach the role, and save.
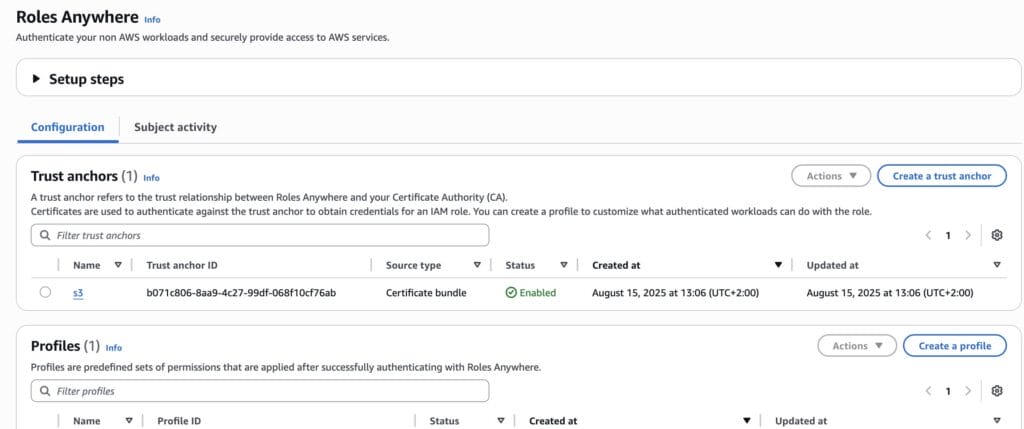
Copy the Profile ARN.
You now have:
- Trust Anchor ARN
- Role ARN
- Profile ARN
Select the previously created role, leave the rest as default and save. Note the ARN of the profile.
Step 4: Build the Docker Image with AWS Signing Helper
Your application will use the AWS Signing Helper to exchange certificates for temporary AWS credentials.
Create an AWS config file (aws-config):
[default]
    credential_process = /usr/local/bin/aws_signing_helper credential-process --certificate /cert/cert.pem --private-key /cert/cert.key --trust-anchor-arn <Trust Anchor ARN> --profile-arn <Profile ARN> --role-arn <Role ARN>
Example application (gets3buckets.py) to list S3 buckets:
import logging
import time

import boto3

logger = logging.getLogger(__name__)
logging.basicConfig(encoding='utf-8', level=logging.INFO)

def list_buckets():
    s3_resource = boto3.resource("s3")
    logger.info("S3 Buckets:")
    for bucket in s3_resource.buckets.all():
        logger.info(f"  {bucket.name}")

if __name__ == "__main__":
    while True:
        list_buckets()
        time.sleep(10)
The Dockerfile
FROM debian:stable-slim

ARG homedir=/app

RUN DEBIAN_FRONTEND=noninteractive apt-get update \
    && apt-get upgrade \
    && apt-get install --no-install-recommends -y \
        adduser \
        awscli \
        curl \
        python3-boto3 \
    && rm -rf /var/lib/apt/lists/*

# Download AWS Signing Helper
RUN cd /usr/local/bin \
    && curl -LO <https://rolesanywhere.amazonaws.com/releases/1.7.1/X86_64/Linux/Amzn2023/aws_signing_helper> \
    && chmod 0755 aws_signing_helper

# Create user to run the app
RUN adduser --system --home "$homedir" --no-create-home --shell /bin/false userapp
RUN mkdir "$homedir" && chown userapp "$homedir"

# After this everything is run under the user
USER userapp

RUN mkdir "$homedir"/.aws \
    && chmod 0700 "$homedir"/.aws

# Copy the aws-config
COPY --chown=userapp --chmod=0644 ./aws-config "$homedir"/.aws/config

COPY --chown=userapp --chmod=0755 gets3buckets.py "$homedir"

WORKDIR "$homedir"

ENV PYTHONUNBUFFERED=1

CMD ["python3", "/app/gets3buckets.py"]
Step 5: Avassa Application Specification
Strongbox certificates are injected directly into the container:
name: s3-client
services:
  - name: s3-client
    mode: replicated
    replicas: 1
    share-pid-namespace: false
    volumes:
		    # Get a cert from Strongbox
      - name: cert
        vault-secret:
          vault: s3-client
          secret: s3-client-cert
          file-mode: "400"
          file-ownership: 100:100
    containers:
      - name: s3-client
        container-log-size: 100 MB
        container-log-archive: false
        shutdown-timeout: 10s
        image: s3-client
        mounts:
		        # Mount cert in /cert
          - volume-name: cert
            mount-path: /cert
        env: {}
        on-mounted-file-change:
          restart: true
    network:
      outbound-access:
        allow-all: true
on-mutable-variable-change: restart-service-instance
When deployed, your application has automatic certificate-based authentication to AWS.
Conclusion
By combining Strongbox and AWS Roles Anywhere, you can:
✅ Eliminate long-lived credentials at the edge.
✅ Use automatically renewed, short-lived certificates.
✅ Securely map edge applications to AWS IAM roles.
This approach ensures secure, automated, and scalable AWS authentication for edge applications on the Avassa Edge Platform.
Acknowledgements
This article borrows from https://dev.to/polarsquad/how-to-use-aws-roles-anywhere-484p.