June 2024: Feature releases & highlights
OS upgrades, enhanced application version visibility, default volumes
- Integrated OS Upgrade: the Avassa system can now manage and control the upgrade of the underlying host OS.
- Enhanced application versioning visibility: we have improved the usability of understanding which versions are currently deployed. There is also a new documentation section on application versioning.
- System default volumes: during early development, you may need a simple way to get local storage for your applications. We have added an action to add a default volume. We have also enhanced the documentation regarding volumes.
Last month came with a killer feature: Virtual Machine orchestration. With Avassa, you can now manage containers and VMs at the edge. June brings another prominent feature: integrated OS upgrades.
OS Upgrades at The Edge
Some Edge Platforms locks you into their specific operating system (OS) distribution to provide an integrated solution. We believe this principle restricts your freedom when it comes to solution design. You should be able to choose a leading OS, in order to optimize security, CVE management, footprint, features, and support. Yet still, in many cases, you want a single automated solution to manage both the OS and application upgrades. With the Avassa June releases, you can define global OS upgrade windows for your edge hosts, and the Edge Enforcer at each edge site will upgrade the host operating systems. We do not reinvent the wheel; the Edge Enforcer leverages each OS distribution’s built-in OS upgrade features.
OS upgrades, how it works
As you know, an edge site in Avassa may have one or several hosts. To manage OS upgrades, we have added an OS upgrade controller to the Edge Enforcer. It manages the overall upgrade process per site in an OS-generic fashion. Then, on each host, you deploy an OS-specific upgrade worker. This is a container application you deploy the same way as your application workloads. We provide worker applications as open source for major OSes like Debian/Ubuntu and Red Hat. You can also build your worker for your custom OS.
You can read more on the OS upgrade mechanisms in:
- OS Upgrade Management Reference documentation
- OS Upgrade Fundamentals
- The OS upgrade worker repository
Using the OS upgrade feature
The overall procedure for using the Avassa OS upgrade functions is as follows:
- Build the OS upgrade worker application for your host OSes.
- Deploy the OS upgrade application to the appropriate hosts.
- Configure OS upgrade windows
- Monitor the automatic OS upgrades.
Since the workers need access to the local Edge Enforcer APIs, they must be built for your Avassa system with the given application roles and secrets to authenticate. Read more in the tutorial.
It’s a good practice to label your hosts with an OS distribution label where you want your upgrade workers deployed. Assume you have labeled hosts running Debian with os-type : debian; you can then use the following deployment:
name: os-upgrade-debian
application: os-upgrade-debian
placement:
  match-site-labels: os-type = debian
Now you are ready to configure the upgrade windows:
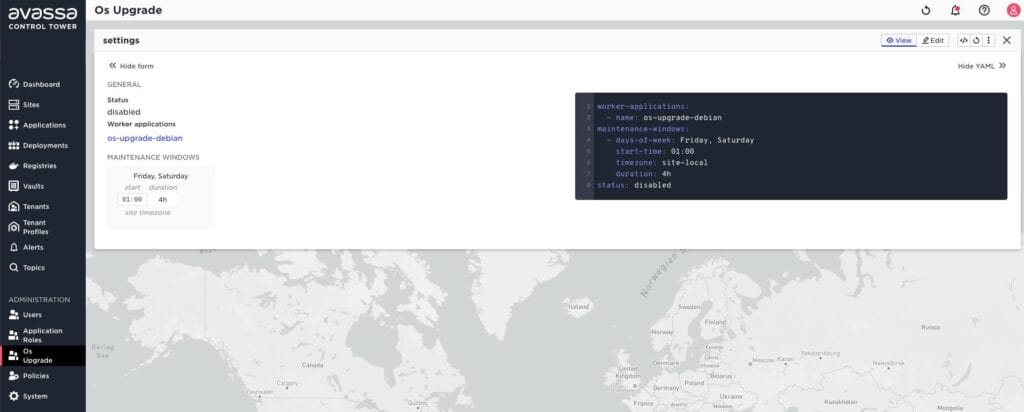
The screen shot above shows an OS upgrade configuration elaborated below:
worker-applications:
  - name: os-upgrade-debian
maintenance-windows:
  - days-of-week: Friday, Saturday
    start-time: 01:00
    timezone: site-local
    duration: 4h
This configuration tells the system that the OS upgrades should run on any site that has the os-upgrade-debian application deployed to at least one host and the upgrades should be initiated each week on Friday and Saturday, at 01:00 local time and must not exceed 4 hours.
The site view in Control Tower has a new tab “OS Upgrade” where you can inspect the status as shown below:
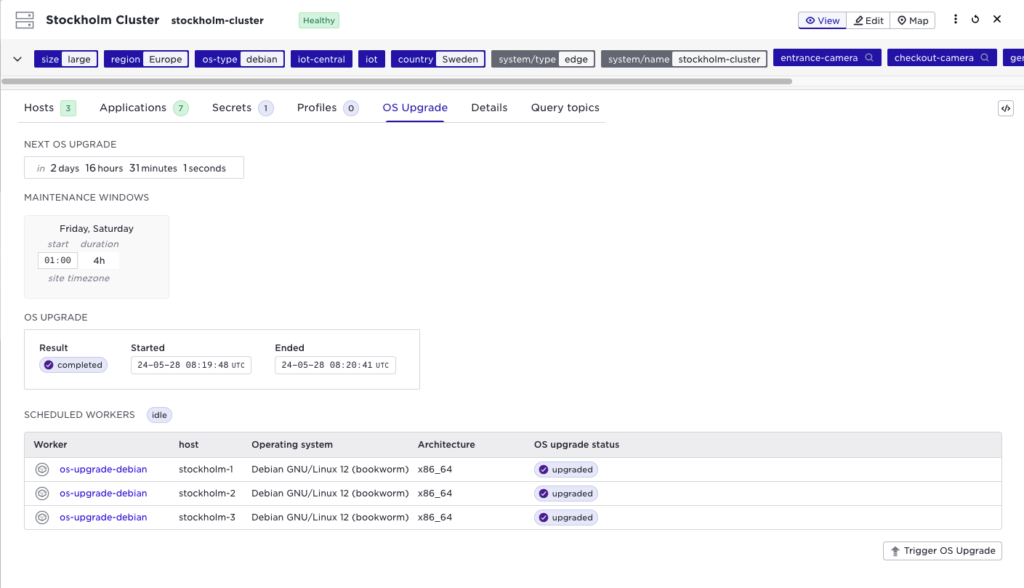
This tells us that the OS upgrade is currently idle (no upgrade in progress), the next OS upgrade is scheduled to start in 2 days and 16 hours, and the last upgrade was successful. You can also see which OS version is currently running on each host. During the upgrade, the controller performs a rolling upgrade on the hosts so that the site is available during the complete process.
In the same way, if you use the host details menu in Control Tower you can see the OS version before and after:
Before

After

Enhanced user interface for application versioning
When you deploy an application you have the option of referencing an explicit version or wildcard to latest. This represents two workflows depending on your development phase. Typically we recommend the following:
- Early experimentation: omit having a version in the application and use a wild-card in your deployment. This means that you can freely edit the application and it will immediately be deployed.
- Operations: use a pipeline for application specifications and deployments and push these to Avassa. Use explicit versioning.
We have enhanced to User Interface to illustrate the various scenarios for application versioning. We have also added a tutorial on the Avassa application versioning mechanisms.
The main enhancements are illustrated below:
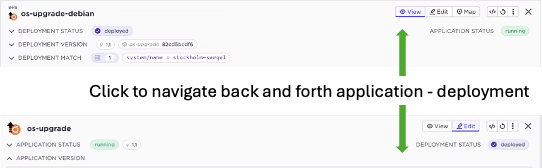
1) Quick navigation between the deployment and the application. The deployment specifies a desired intent, whereas the application shows the current state. It could be the case for example that the deployment says to deploy version 1.5, whereas only version 1.4 is currently available and deployed. In the top section of application deployment, you see a summary for each and a quick link.
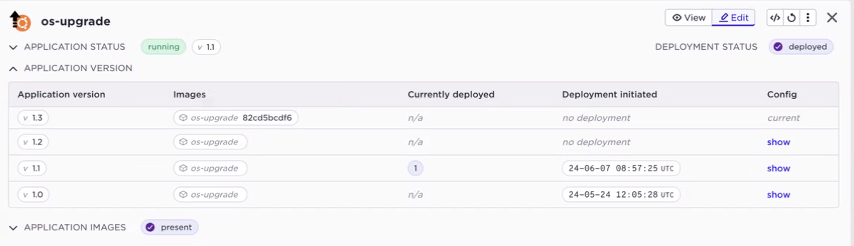
2) For a deployment what is the current status at the edges? In the top section of the deployment you will get a more detailed view of what is currently running at your edges. The screenshot below the above described OS upgrade deployment. We can see version 1.1 is deployed. In addition to the application version, the container hash or tag is shown as well.
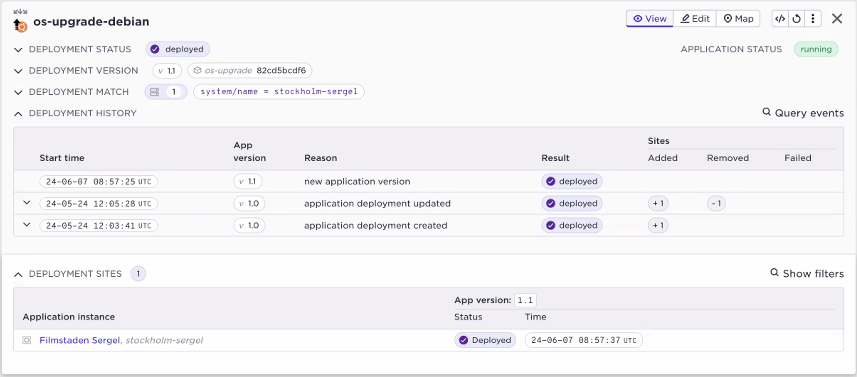
An additional feature is that the deployment gives an indication if new sites have been added to the Avassa system that matches the label expression. Note that the label match expression is only validated at deployment time. So the situation below indicates that there are two more sites matching.

In order to re-evaluate the label match, use the redeploy action:
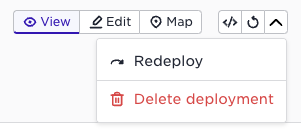
3) More details on application versions. In the example below we see that for the os-upgrade application version 1.1 is running (from the deployment above), but we have versions 1.2 and 1.3 available. Also here you get direct insights into the container image version.
System provided volumes
Avassa has built-in support to easily manage the volumes that your application needs. In the site configuration, you define volumes that the hosts provide like:
- name: edge-site1
  type: edge
  hosts:
  - host-id: 94d4f410-1ef7-4f01-a296-c4ce4f23bf0e
    local-volumes:
      - name: local-disk-volume-storage
        path: /local-volumes-storage
The above assumes that you have mounted the volumes for application data into /var/lib/supd/volumes . In the production environment, it is recommended to keep the local volumes on a separate partition to prevent the applications managed by the Avassa solution from competing for disk storage with the OS or the Avassa platform. All of this requires coordination with someone that has access to the host filesystem.
In some cases, especially during the development phase, it may be practical to provide the applications with some kind of storage without the hassle of the coordination between different parties or getting access to the host file system. In this case, it is motivated to use the system-defined auto volume.
An auto volume is an implicit local-volumes definition that is inactive by default. For it to be activated a filesystem path corresponding to this definition must be created.
The Avassa platform defines the following action to create the filesystem path and activate the auto volume:
supctl do -s edge-site1 system cluster hosts edge-site1-001 create-auto-volume
This action creates a directory _auto under /var/lib/supd/volumes and activates the auto volume.
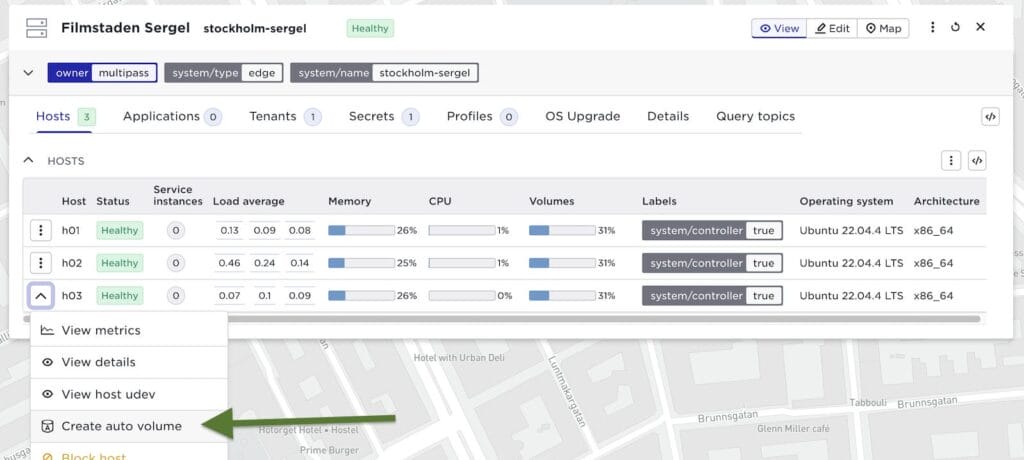
It is also available in host menu:
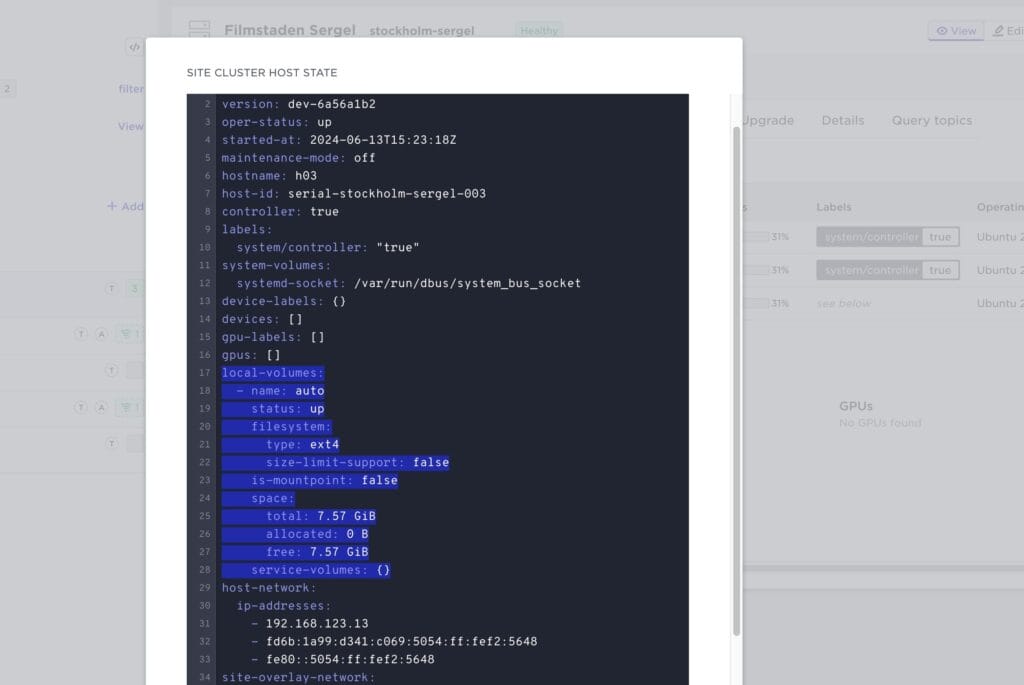
And you can inspect the host state to see the volume:
In summary: use the above create-auto-volume in order to get a default volume in an easy way when developing and experimenting. For operational scenarios, make sure you mount a volume from a dedicated partition.
Read more in our updated documentation on volumes:
- Storage configuration: configuring storage to be used by applications
- Application persistent storage: different ways of storing data on volumes from an application
Haiku
A file that big?
It might be very useful.
But now it is gone.